Dental implants do provide better long-term value than conventional teeth replacement options. But before you consider it and look for dental implant pricing, you should be aware of a possible dental implant removal. This will allow you to make an informed consent. Most dental implants are removed in order to change the overall position of the restorative strategy or implants failure.
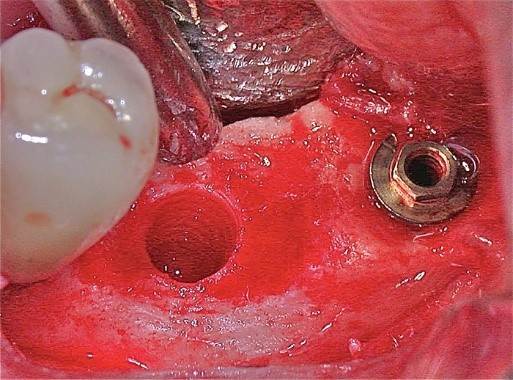
The removal of a dental implant is a rare intervention given the high percentage of successes in modern implantology. However, when an implant failure occurs, it may be necessary to remove the implant. The removal of a dental implant, due to the rarity with which it is performed, is much more complex than an implant surgery. A dental implant is removed if there are no possible alternatives, the main conditions occur following an implant failure or following the implant fracture.
When to remove dental implants?
Early implant failures
This happens within the first few months after the implant. It’s mostly caused by infections during the healing process or failure to integrate properly with the bone.
Dental implant rejection
Implants are viewed as foreign materials by the body. If the jaw is compromised by bacterias during implantation, then the patient’s body will definitely reject it.
Prolonged pain
Some patients may encounter prolonged pain after placement. This can be caused by minor nerve branch or severe localized inflammation. The removal is necessary if the pain persists.
Improper osseointegration
It happens when the implant surface fails to fuse with the surrounding bone. Several factors associated with osseointegration include limited availability of the bone size, overheating of the jaw bone, or infection occurrence.
Allergic reactions
It’s common in patients who are allergic to metal.
Other causes
Dental implants with the following conditions should be removed:
- Infected dental implants
- Implants with significant bone loss
- Fractured or broken dental implants
- Implants placed in wrong position that can not be restored
- Implants with mobility or movement
- Implants with no bone coverage that are symptomatic
- Implants with gum recession and exposure of implant surface
- Non-restorable dental implants
- Implants with fractured screws inside that can not be retrieved
How to Tell if Your Dental Implants are Failing?
While there are several different possible causes of implant failure, the signs are the same. You’ll know that your dental implants are failing if you start to experience severe pain or discomfort in or around your dental implants, if your gums are swollen or inflamed, or if your implant starts to become loose.
Common implant removal methods – techniques
The key is to preserve as much healthy bone as possible in the removal process. Essentially the best tools used to remove an implant would be ones that have enough force to remove an implant without causing significant damage. It is possible to remove an implant in some cases with almost no bone removal. This is the ideal goal and highest-best approach.
In order to remove a failed dental implant there are two approaches that are generally used.
- One method involves the use of a cutting device, called a trough bur. This tool is designed to cut a small portion of your bone (0.5 – 1.0 mm) safely and accurately along the implant edge, which will release the tension on the implant and expedite its removal.
- Some dentists prefer using an instrument called a piezo-electric device with a special micro tip. Piezo tomes use an ultrasonic type of energy to gently remove bone around an implant. Again the key is to minimize the removal of tiny amounts of bone from each side of the implant which will facilitate its removal. It’s usually best to keep as much bone around the front and back walls of the implant area as possible when engaged because the other areas can often regenerate spontaneously.
Finally, new technological breakthroughs in removal systems are coming. They are not perfect and the skill and experience of your dentist is important in knowing how to use the tools. These removal systems use high reverse torque and may remove your failed dental implant in a few minutes. Often, these high-torque tools are connected or hooked to the adapter and a high amount of reverse torque is applied, efficiently removing the implant from the bone. There are 3 brands currently on the market. This combined with other techniques and a careful plan is the best way to remove a failed dental implant.
Are some dental implants easier to remove than others?
If you have an failed dental implant that needs removing, then the adherence depends on your bone quality. In general, implants in the lower jaw are more difficult to remove than the upper jaw. But implants in the upper jaw may also be very firm. Duration is a factor too. Over 24 months is a significant period in which the bone and implant firmly set together. implants with only 2-3 mm of bone still around the implant, the implant fixture is very firm. This is because bone forms a very strong chemical bond to the implant surface.
Another consideration is the width, length and connection of the implant. Wider and longer implants are obviously more difficult because there is more bonding to bone. Narrow implants can be more difficult because the implant top may fracture under high stress during removal. Strange and unusual external connections are present with more than 1000 brands of implants, which can make it difficult for some removal tools to fit into the existing connections. Essentially limiting the easy facilitation of the extraction!
Finally, some implants are near structures such a lower nerve or upper sinus. Great care is needed to prevent damage to adjacent teeth and sensitive structures.
What to do after dental implant removal?
Depending on the circumstances, anatomical considerations, and biological reasons, there are several treatment options immediately following removal of a failed dental implant:
No immediate treatment
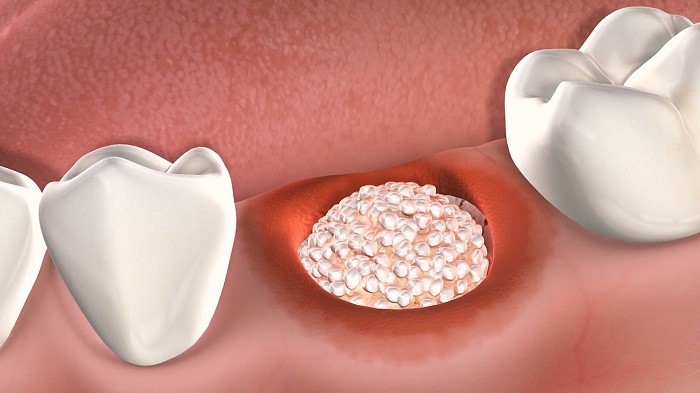
Allow gum tissue heal for 2 months and then re-assess the site for replacement with a new dental implants. If bone is deficient, it is augmented using an appropriate grafting technique. A new dental implant is then placed.
Can another dental implant be placed after the failed one is removed?
In some cases, a new implant can be immediately placed in the site along with a bone grafting procedure to support the new implant. This immediate implant replacement option will save you time and prevent the need for a follow up surgery, which would also save you money.
Sometimes a failed dental implant can’t be replaced quickly because of the size of destruction. Removals that end up creating a much bigger hole than the implant fixture make it harder or impossible to replace the implant. Therefore, it is very important to attempt to remove implants in a gentle way, and be prepared to include a bone grafting procedure in the area for reducing the loss of healthy bone. The bone grafting procedure is aimed at creating a healthier bone site for the placement of a future implant.
Can save implant with bone grafting?
This is one of the critical discussions going on in implant dentistry these days. There are samples of success stories of failing or ailing implants that receive a second chance to integrate with a surge of new bone growth.
However, the chance of re-growing bone successfully over a challenged implant is under 8-25%. The risk of contamination is ever present and there is also a high probability that perio-implantitis will emerge again. On a positive note, studies do illustrate if there is good tissue growth on the sides of the implant and you keep the implant very clean, it may last longer. Currently the research is very mixed in terms of the approaches to use to save ailing implants in terms of antibiotics, techniques for surface decontamination and techniques and materials for bone regeneration. Each dental implant is different in its surface features and therefore it requires significant consideration to decide what techniques might work best for each type of dental implant surface.
Also, there are many factors to consider when performing this salvage procedure. Including what kind of defect or failure occurred and the amount of bone loss you’ve sustained. The design of your implant, oral hygiene level and access for cleaning, whether you’re a smoker or not and your general medical condition all important elements in this process.
Prevention
To ensure the longevity of an implant, specific techniques and efforts are necessary to keep it clean and free of destructive bacteria and plaque, which can cause infection in the tissues around the implant and lead to failure. Without tenacious biofilm removal, peri-implantitis can develop and result in implant loss.
The dental hygienist has an important role to play in keeping dental implants disease-free. Traditional dental hygiene scalers used on natural chompers can scratch a crown, abutment, or implant, so your hygienist will instead use special gizmos made of plastics and resins to thoroughly clean without causing damage. Implant recipients also play a significant role in the success of their own restoration and must be motivated to take care of the implant. Here’s how to provide the best care at home.
- Clean at least twice a day with a soft-bristle toothbrush
- Use a low-abrasive toothpaste
- Brush under and around the implant crown
- Use a nylon coated interdental brush to clean hard-to-reach places
- Floss daily with unwaxed tape or implant-specific floss
- Use a recommended oral irrigator


